Utilizing Google Analytics
November 9, 2021

Custom CSS & Javascript: Social Media Icons
October 21, 2021


Custom CSS & Javascript: Tracking Shipments
November 17, 2021Learn more about your portal engagement!
What is Google Analytics? Google Analytics is a website analytic service that collects data from your site and the customers that use it. By inserting Google Analytic code on your web-to-print portals, you can activate tracking that will give you invaluable insight as to how users are utilizing your storefronts.
How will this help me? Google Analytics can give you the data you need to better understand your customers. You can then use those insights to modify your portal or add additional products and increase sales.
This blog post will cover the setup process for adding Google Analytics to a DocketManager web-to-print portal.
Creating your account:
To setup your Google Analytics account:
1. Log in to your Gmail account or create a new one.
2. Go to https://analytics.google.com/analytics/web/ and click Sign Up.
3. On the home page for Analytics, click Start Measuring to begin your account setup.
The next page should look like this:
4. Enter an Account Name such as your print shop name, then click Next.
The next page should look like this:
The next page should look like this:
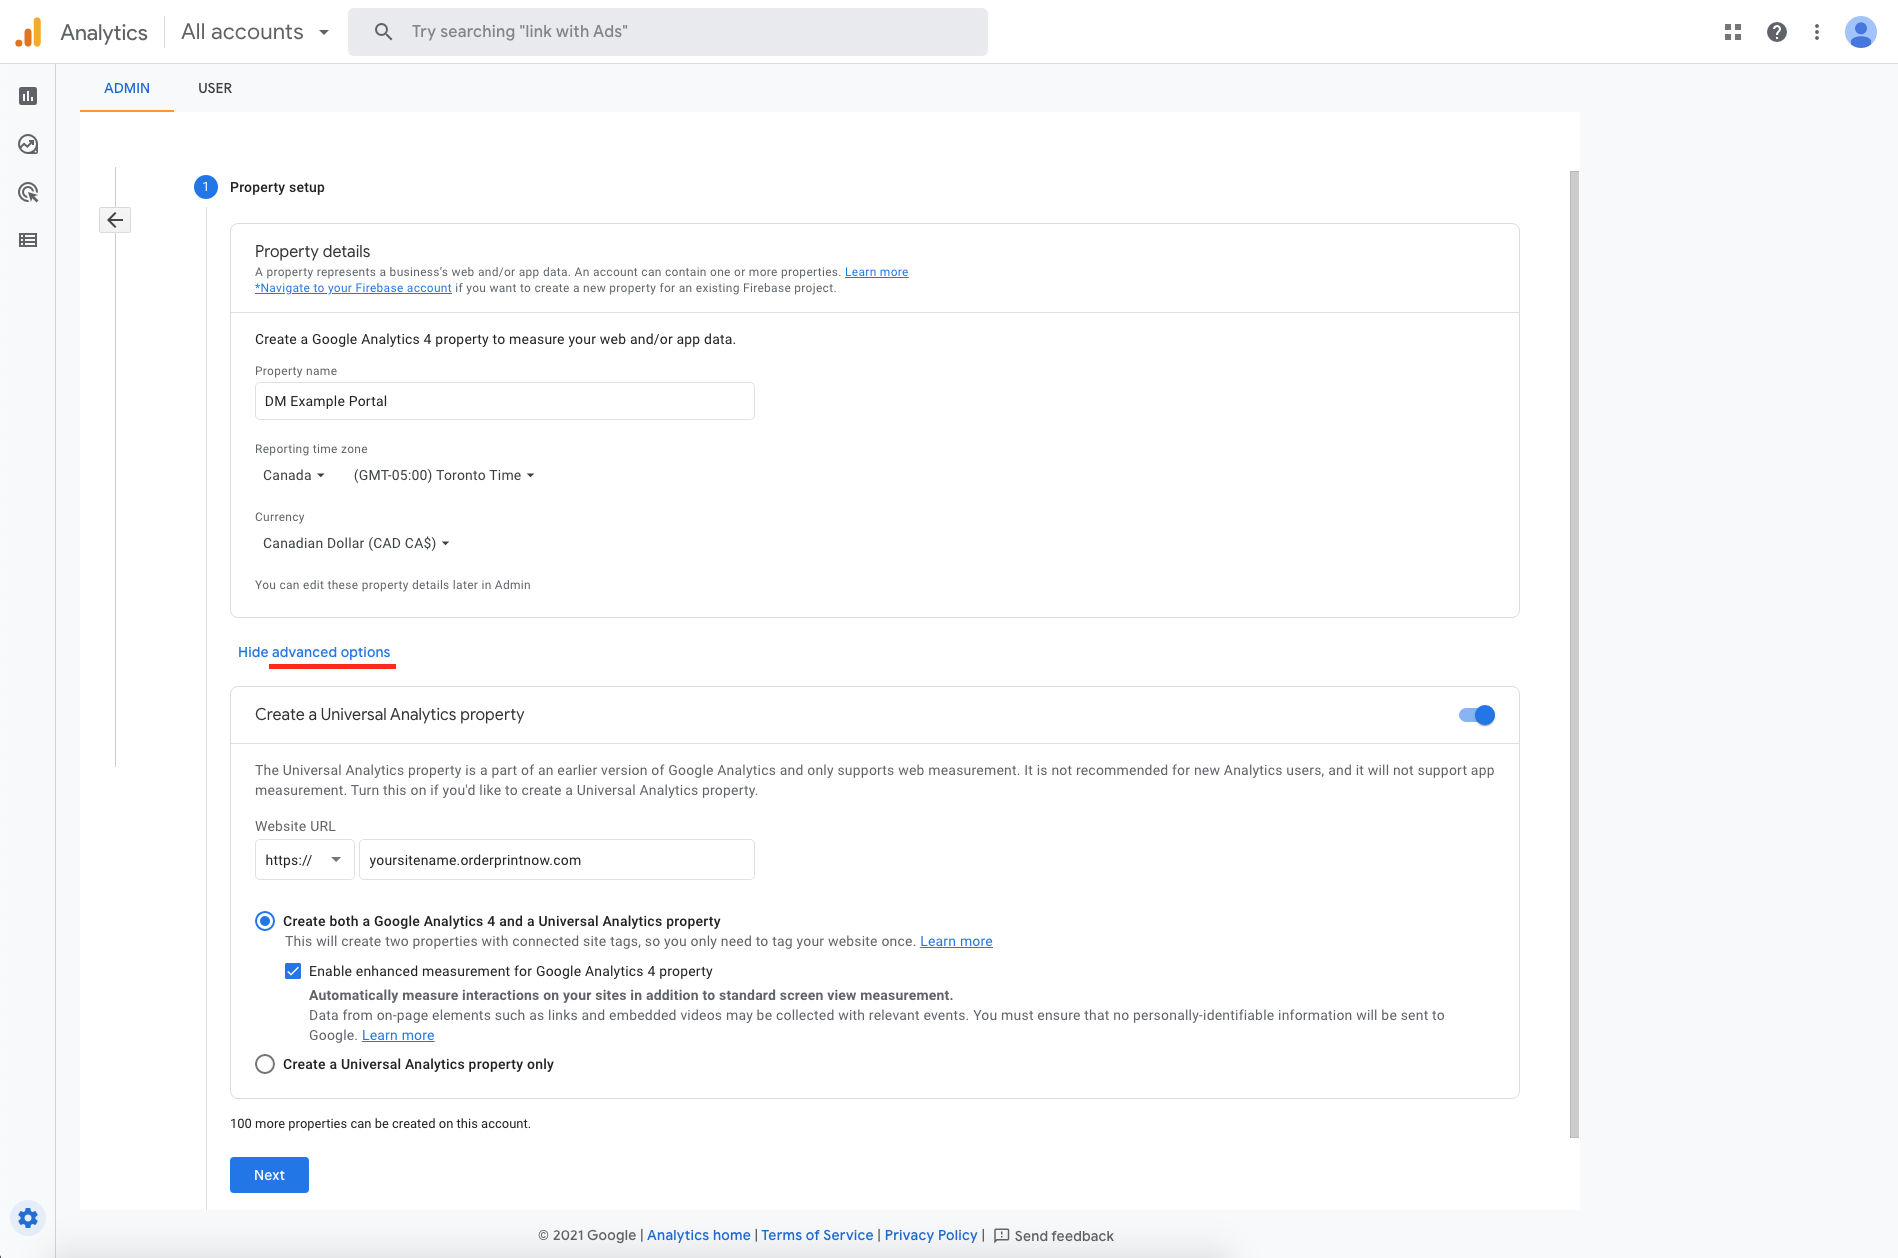
5. Enter your portal name as the Property Name and fill out the other details.
6. Click Show Advanced Options and enter your portal URL. Click to create a Google Analytics 4 and a Universal Analytics property, then click Next.
The next page should look like this:
6. Click Show Advanced Options and enter your portal URL. Click to create a Google Analytics 4 and a Universal Analytics property, then click Next.
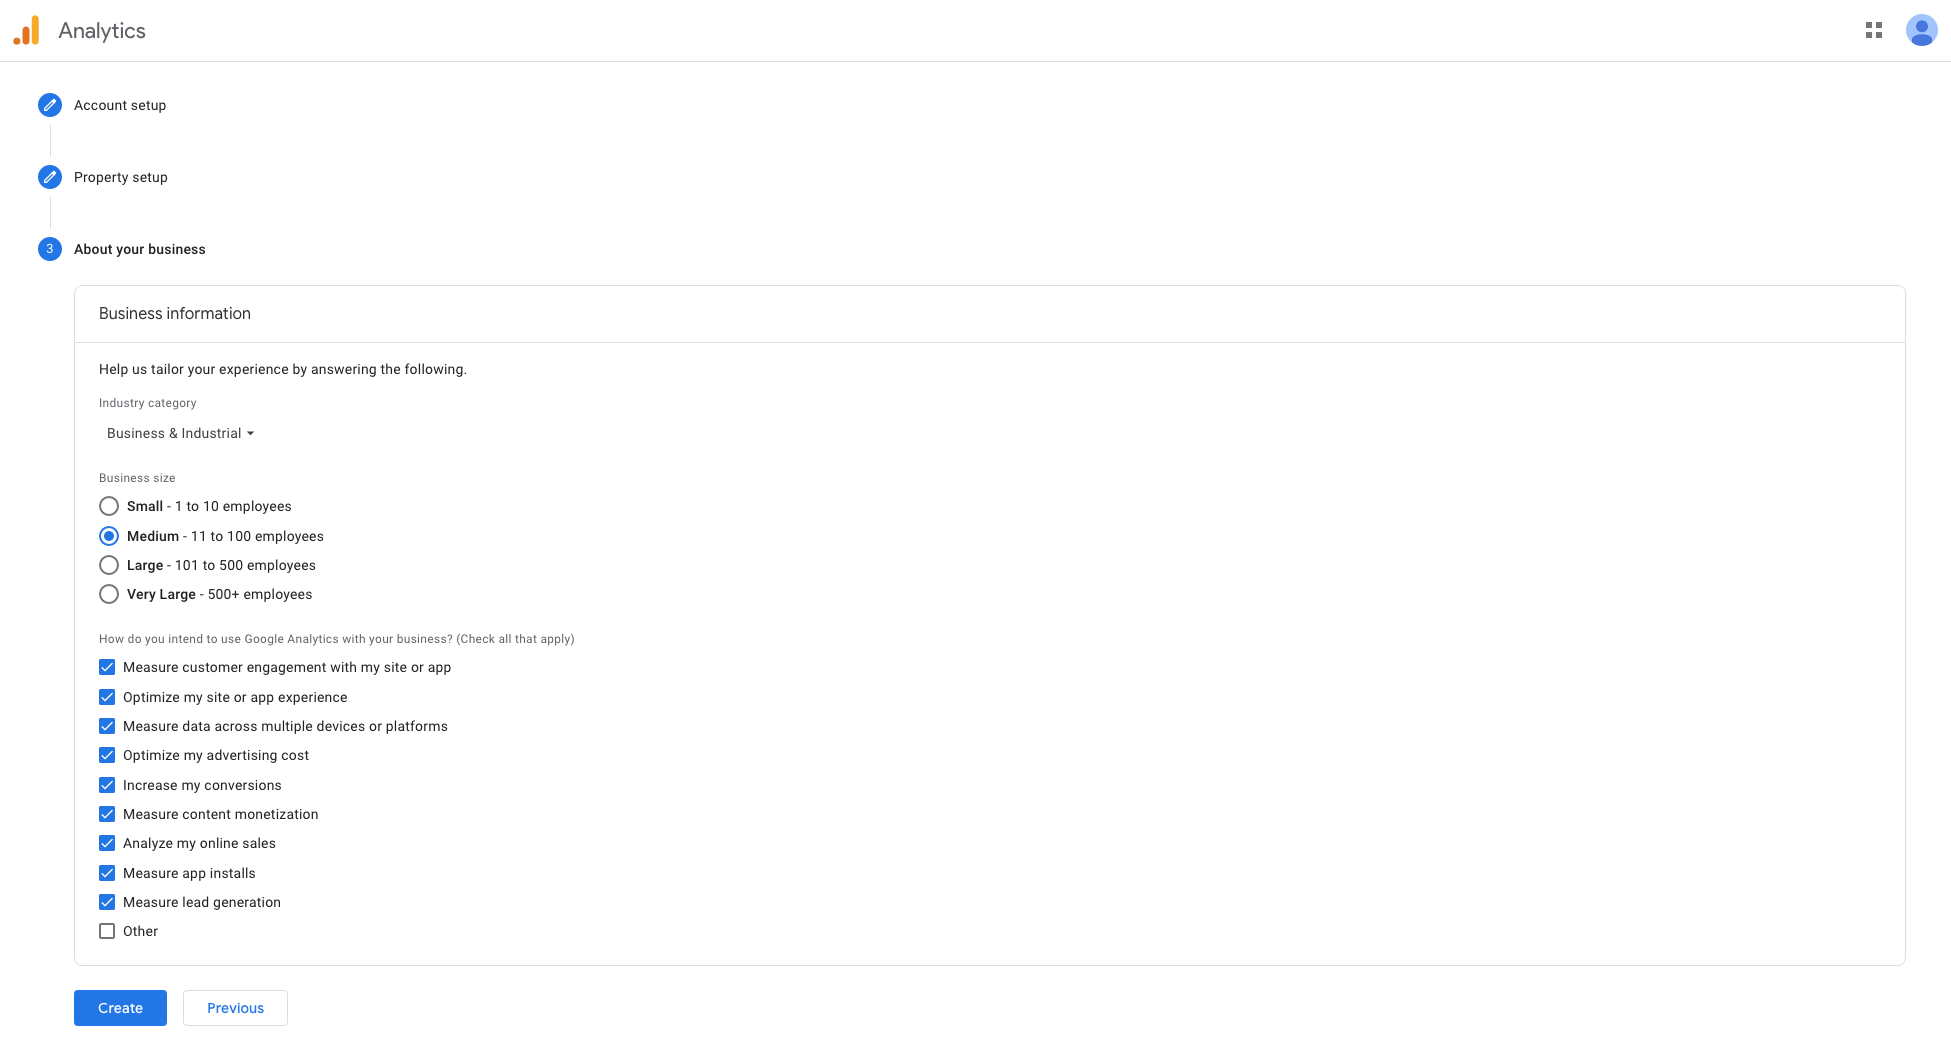
The next page should look like this:
7. Finish filling in your business information, then click Create to complete setup.
Generate your Measurement ID:
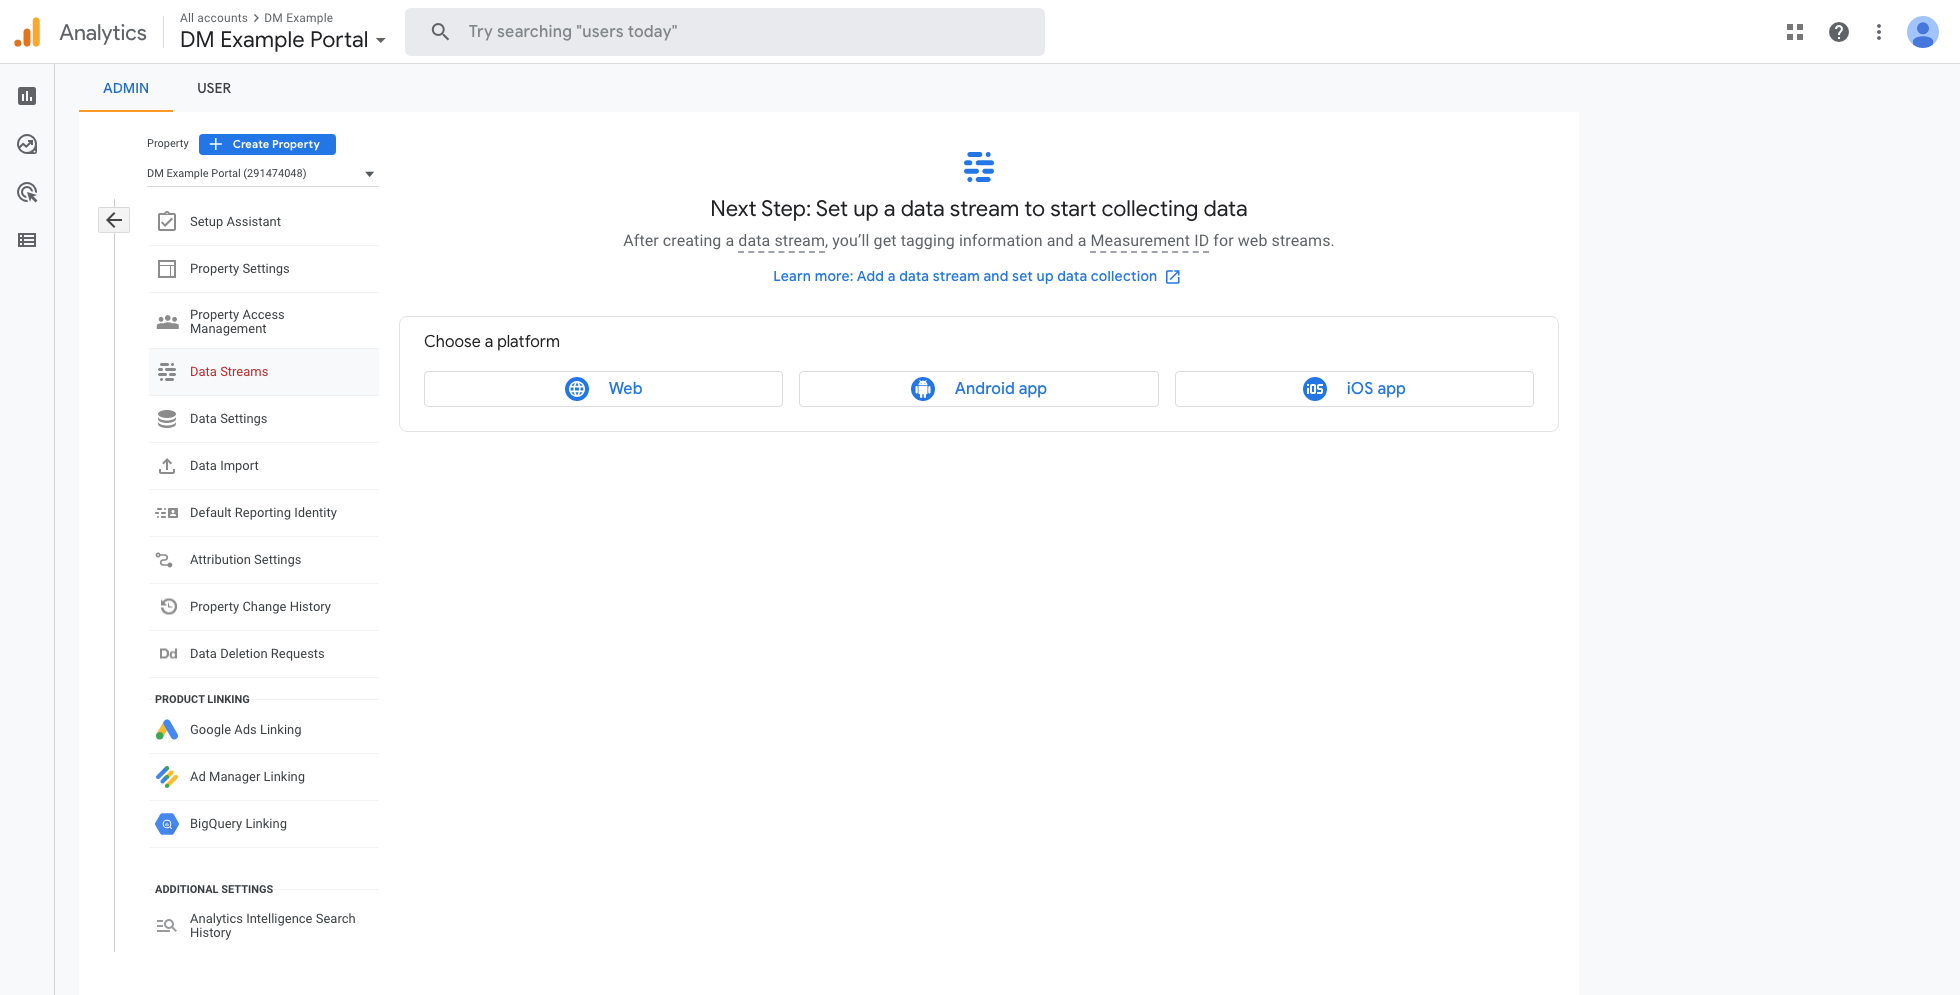
The next page that appears should look something like this:
1. Select Web from the options in the centre of the page.
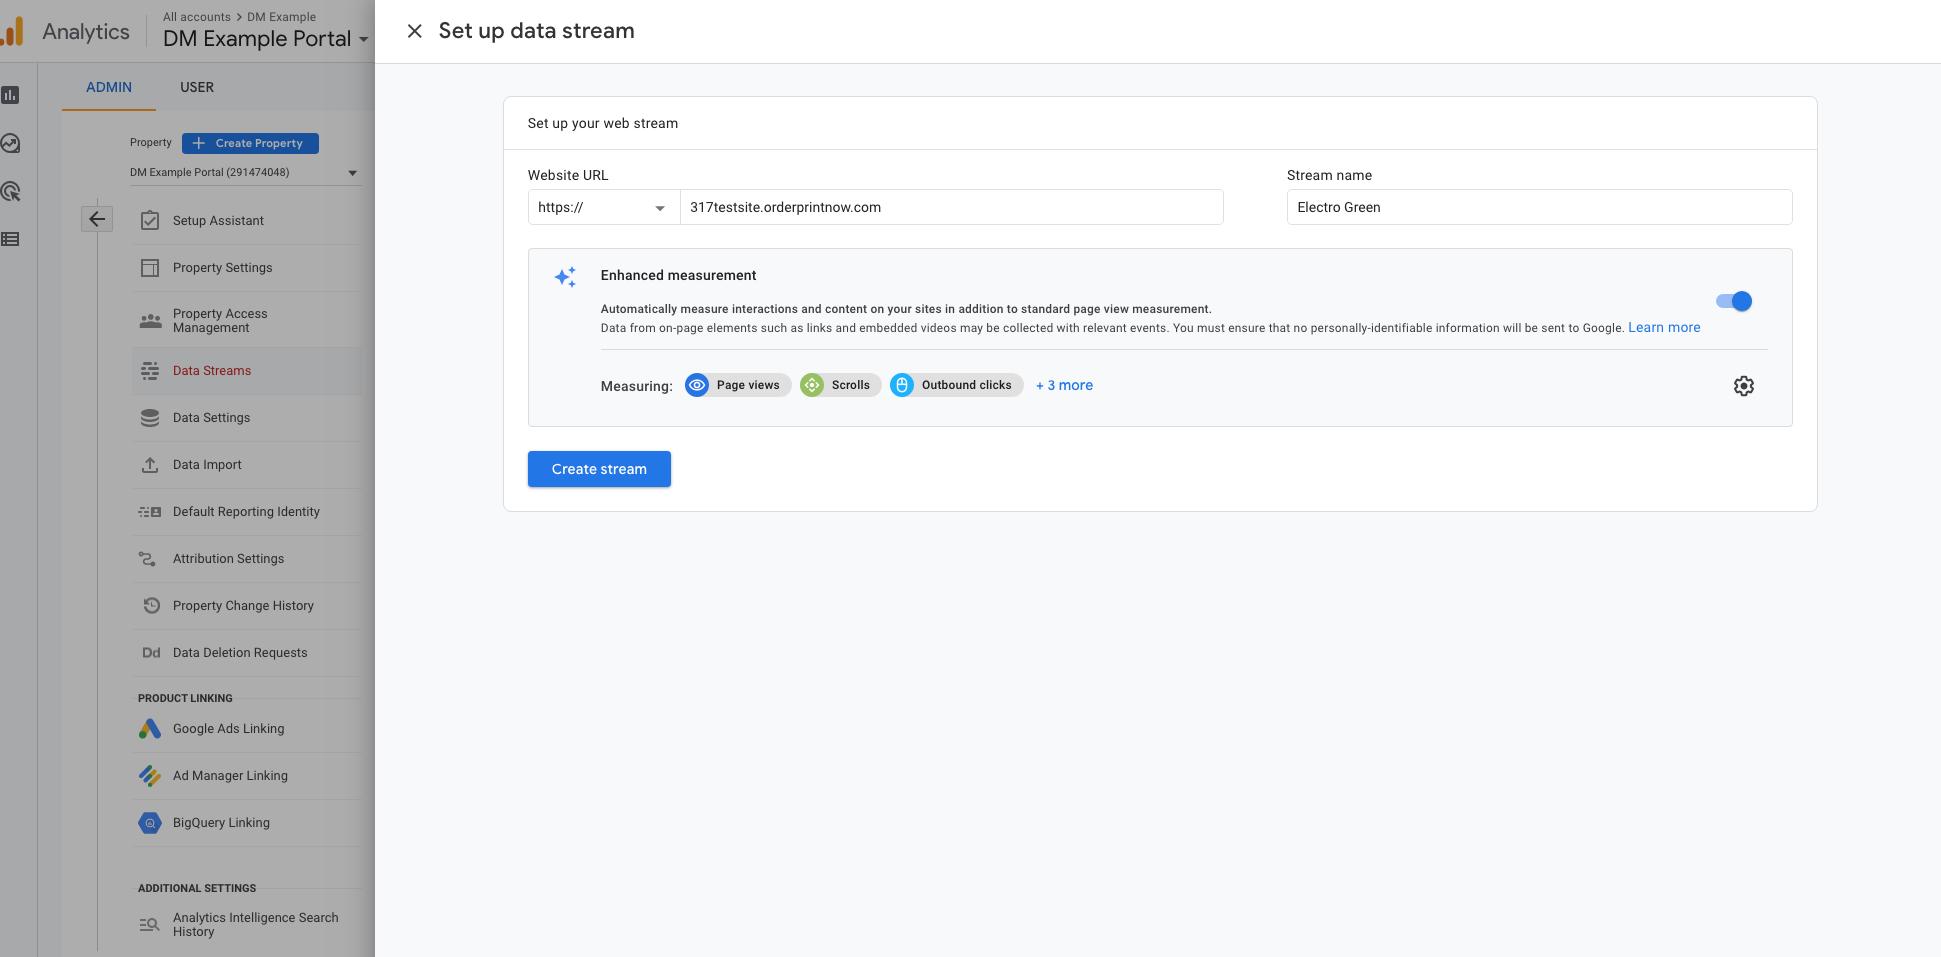
A page should slide out that looks like this:
A page should slide out that looks like this:
2. For the website URL choose https:// and enter yoursitename.orderprintnow.com for the URL.
3. For the Stream Name, enter the name of your portal, then click Create Stream.
The next page should look like this:
3. For the Stream Name, enter the name of your portal, then click Create Stream.
The next page should look like this:
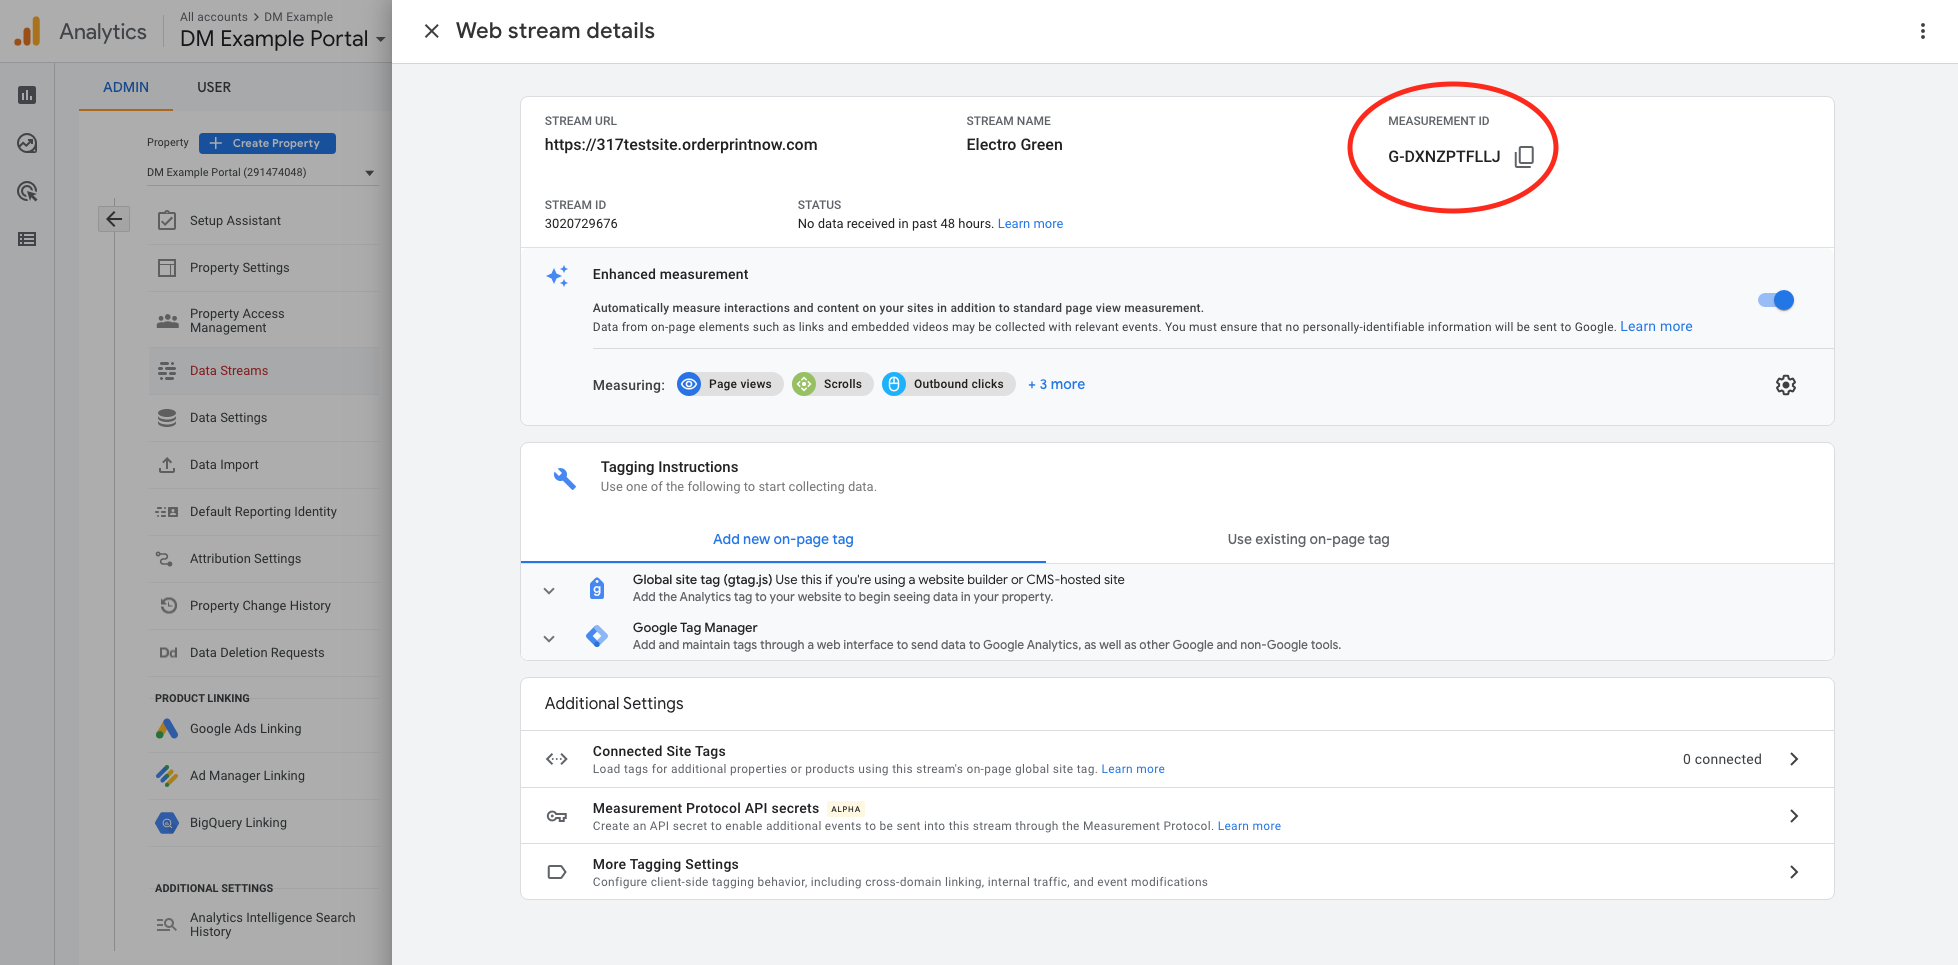
4. Copy your Measurement ID from the top right corner then navigate to your portal settings to finish setup.
Adding it to your portal:
Navigate to your DocketManager MIS
1. In Settings > Online Configuration, click on the portal you would like to add Google Analytics to.
2. Under the Logo Upload field, click Customize This Portal.
3. Copy the following Javascript and add it to your portal's Custom Javascript box:
$('head').append("<script async src='https://www.googletagmanager.com/gtag/js?id=code-here'></script><script>window.dataLayer = window.dataLayer || [];function gtag(){dataLayer.push(arguments);}gtag('js', new Date());gtag('config', 'code-here');</script>");
4. In the code, replace the TWO instances of "code-here" text with the Measurement ID you copied from your Google Analytics account.
5. Click Save on your Portal Settings page.
That's all, folks! You have now added Google Analytics to your portal!
We recommend visiting your portal and clicking around a bit so that you can make sure the code is working. It can take a few minutes for the code on the portal to transfer data back to your Analytics account.
Reading your data:
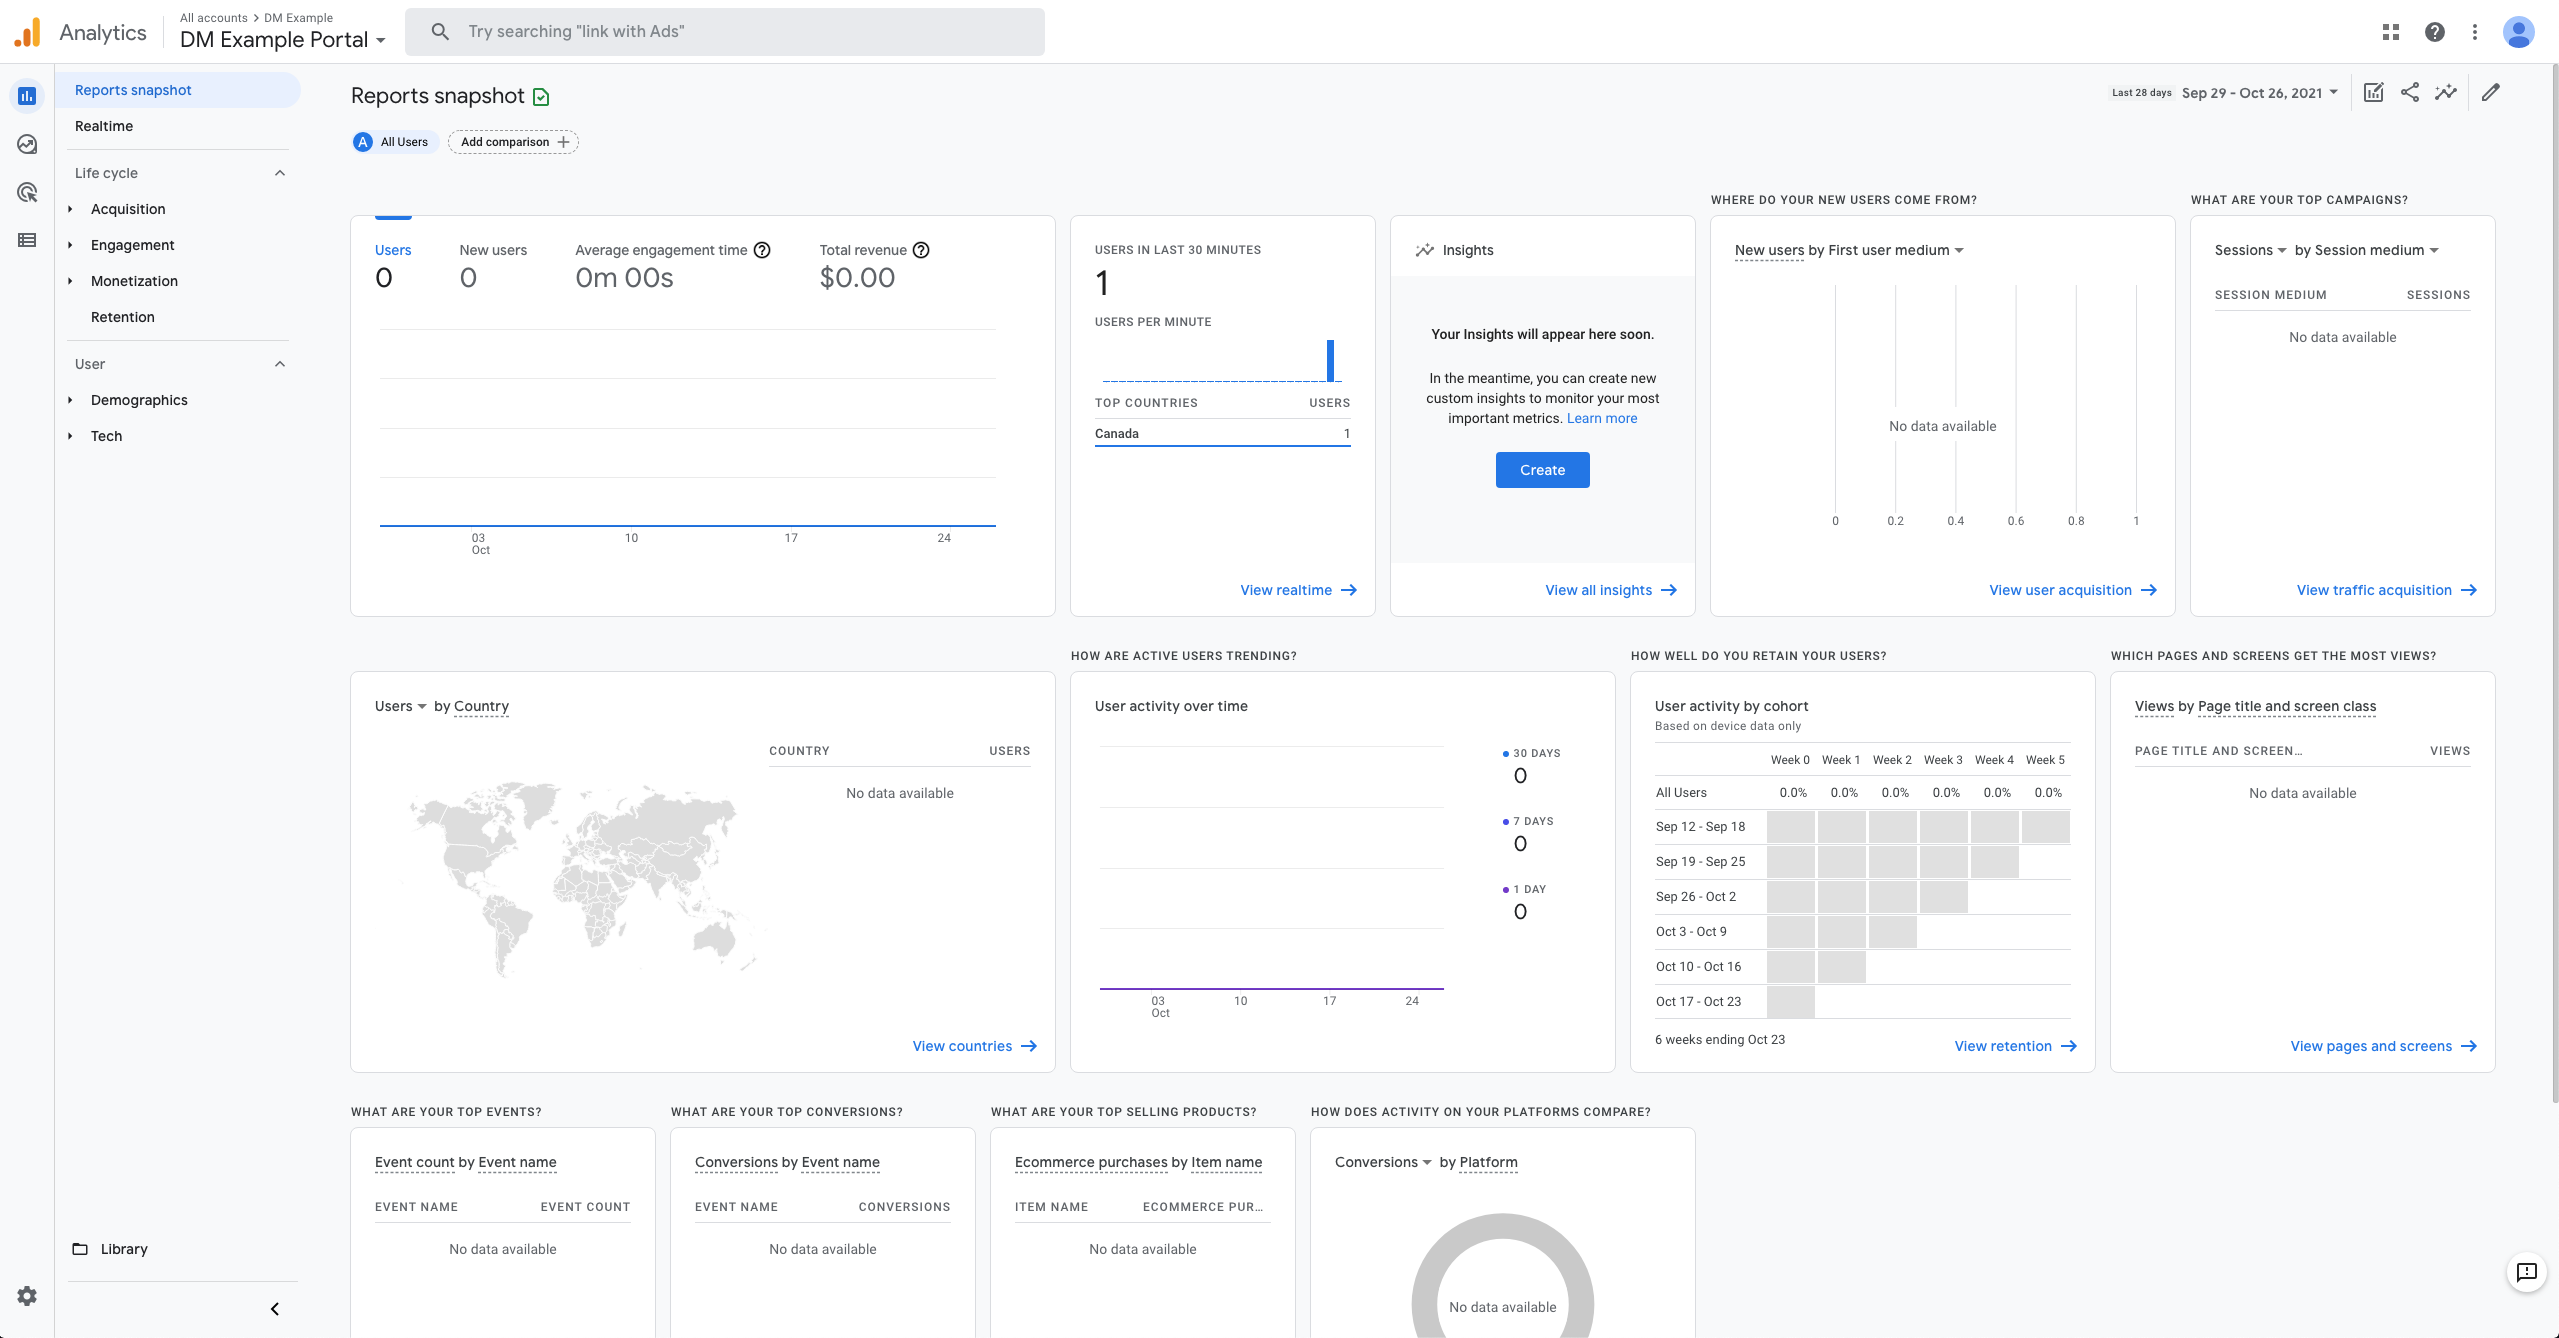
Now when you open your Analytics account and click Reports in the top left, it should look something like this:
The longer the code is tracking your portals, the more data it will collect and showcase in your account. From this data, you can learn where your users are located, how they found you portal, what kinds of devices they are using, your top-viewed products and pages, and so much more!
If you need help implementing this tracking code, email our support team at support@docketmanager.ca


