Custom CSS & Javascript: Multi-Customer Register Page
October 23, 2024

FAQ – Hidden Features: Part 5
October 10, 2024


Portal Pages
November 12, 2024Making Multi-Customer Portal Registrations a Breeze!
Having a portal that is used by many companies can get a bit complicated when it comes to registrations. While portals can now be customer-specific, there are multiple-company scenarios (think parent/child companies that need to use the same portal) when this is not enough and separate tax rates may apply based on which customer the contact belongs to.
Luckily, we can easily resolve this with a custom page and a bit of code. Let's get started!
Custom Registration Page
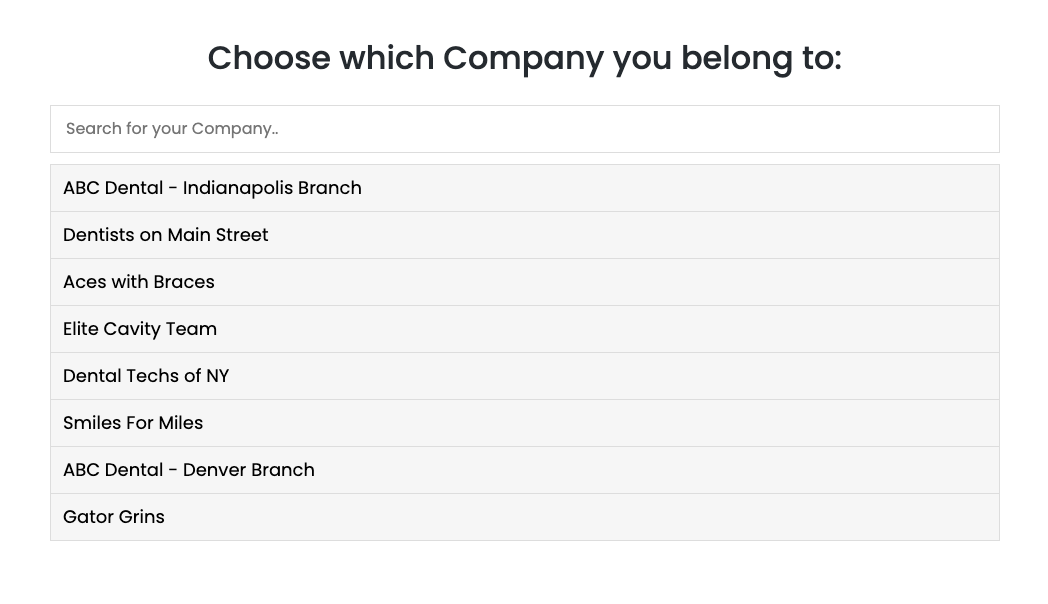
There any many ways in which this custom registration page can be done, whether it be a simple list of company names or a grid of clickable logos to select from. For this example, we will tackle an option that is a bit tricker - a searchable list of companies.
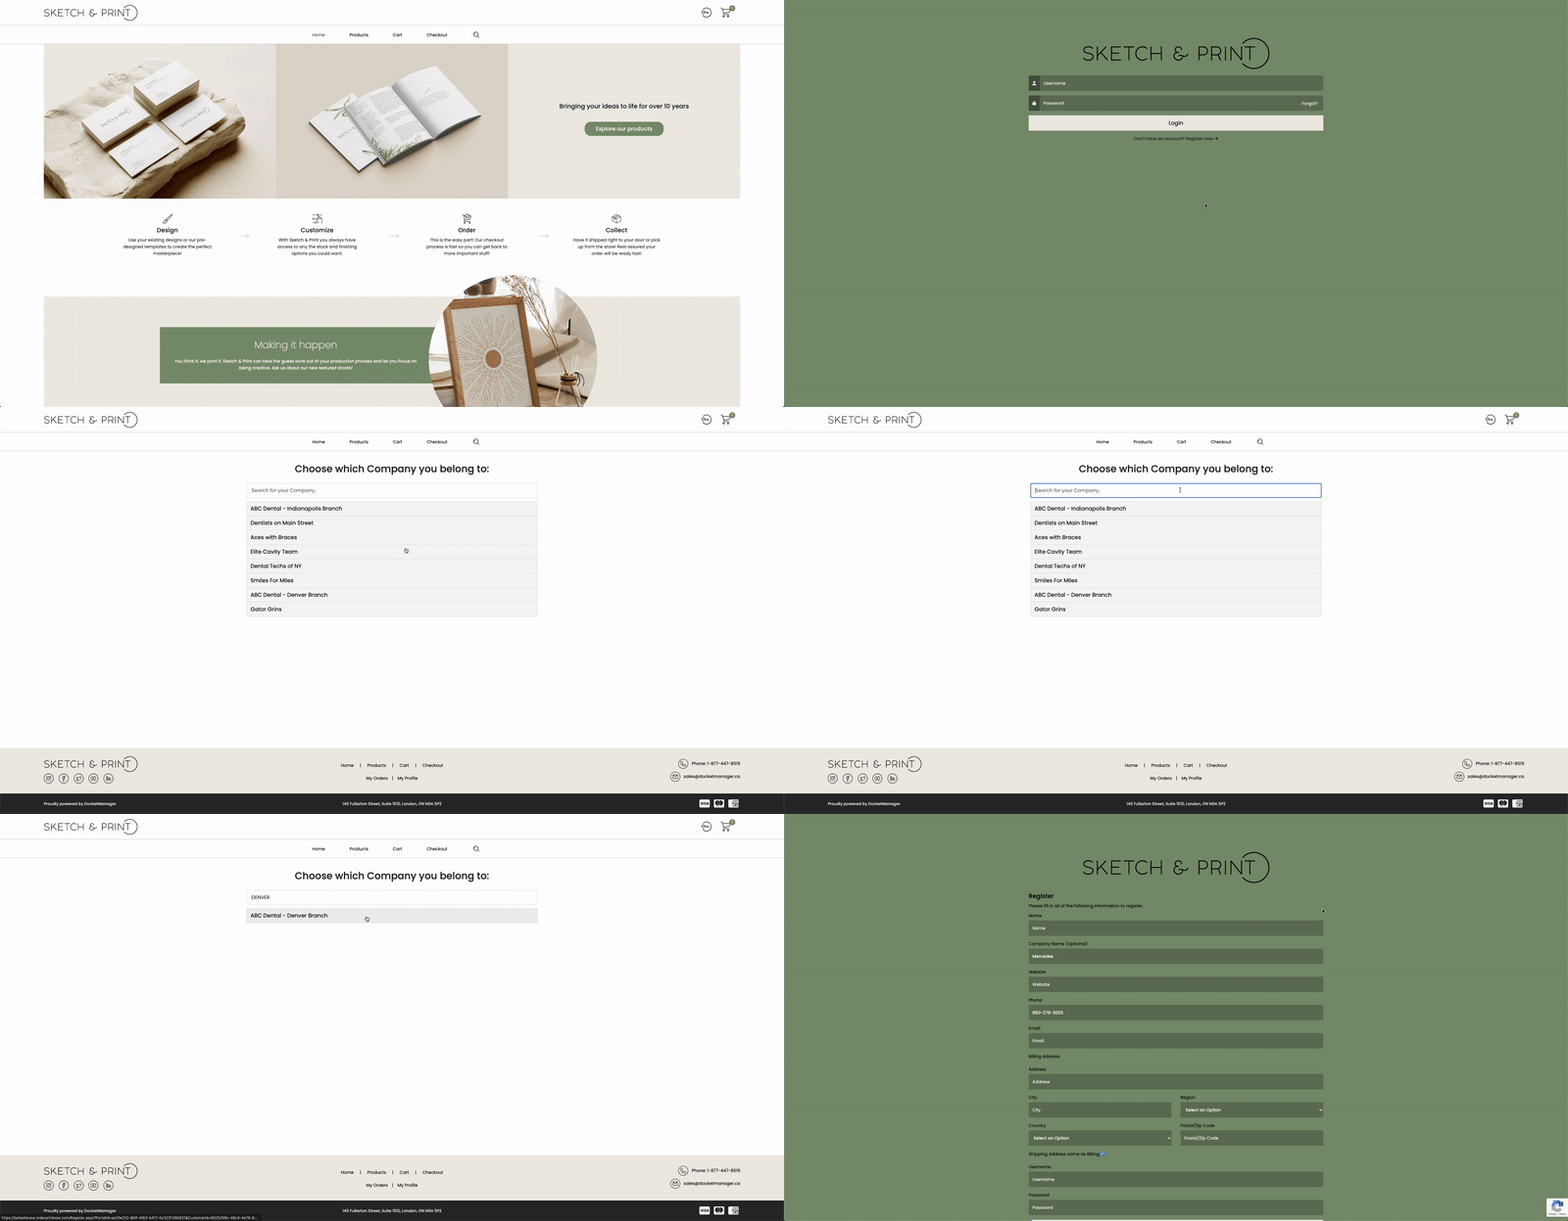
The way this works is by directing the Register links on the portal to a Custom Page also set up on the portal. On that custom page is where we add the list of companies to choose from.
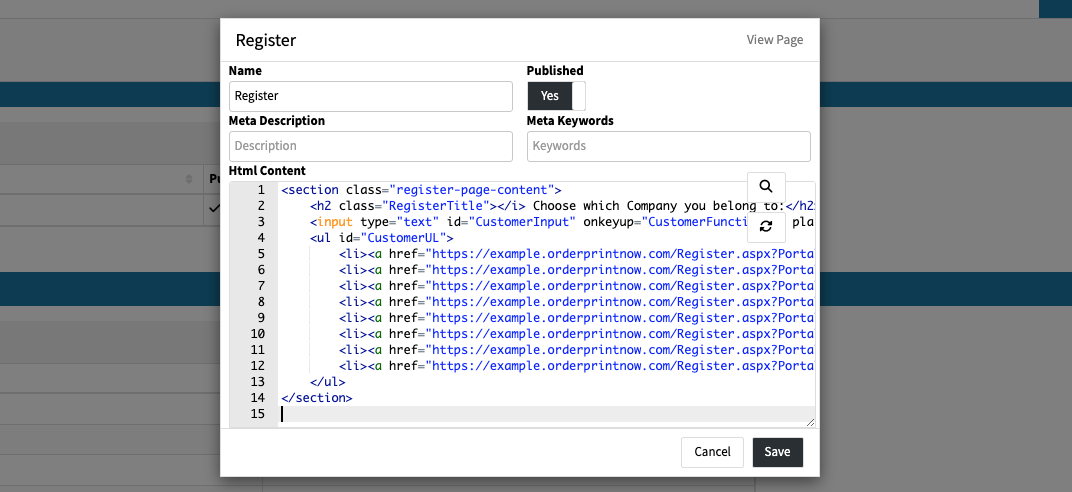
To get started, navigate to Online Ordering > Portals/Themes > select your portal > Pages > New.
In the HTML Content box, copy and paste the code below:
<section class="register-page-content">
    <h2 class="RegisterTitle"></i> Choose which Company you belong to:</h2>
    <input type="text" id="CustomerInput" onkeyup="CustomerFunction()" placeholder="Search for your Company.." title="Type in a name">
    <ul id="CustomerUL">
        <li><a href="https://LINK-HERE">CUSTOMER NAME</a></li>
    </ul>
</section>
You will need to duplicate the third-to-last line for each customer you would like to offer registration for on the page and change the CUSTOMER NAME text to what you would like displayed.
Once you have done so, you will need to generate the customer-specific registration link for each one. This sounds like a daunting task but it's really quite simple!
A customer-specific registration link consists of 2 parts: the normal registration URL for the portal and the Customer ID for the Customer you'd like users to sign up under when using that link.
Simply go to the Register Page on your portal and copy the URL in the address bar. Paste it in a text or notes application for now.
Next, find the Customer's ID. This can be found in the URL of their CRM profile in your MIS or in the first column in the CSV when exporting the customer.
The last step is to combine these 2 values together with the text &CustomerID= in between. Let's say your normal registration URL is:
https://example.orderprintnow.com/Register.aspx?PortalId=f49ggea2-66b3-4f5b-9c10-a513973e94f6
and the Customer ID you want to set it to is:
9025299c-ddc4-4e78-83c0-6e62440491cc
your final URL would be:
https://example.orderprintnow.com/Register.aspx?PortalId=f49ggea2-66b3-4f5b-9c10-a513973e94f6&CustomerID=9025299c-ddc4-4e78-83c0-6e62440491cc
That's it! Update each of the lines you duplicated with that customer's registration link and the hardest part is over!


Still with us?
The last steps are to add the CSS & Custom Javascript to set the styling and functionality.
Copy and Paste the following into your portal's Custom CSS box:
 .register-page-content {
     max-width: 950px;
     margin: auto;
 }

 #CustomerInput {
     width: 100%;
     font-size: 16px;
     padding: 12px 20px 12px 15px;
     border: 1px solid #ddd;
     margin-bottom: 12px;
 }

 #CustomerUL {
     list-style-type: none;
     padding: 0;
     margin: 0;
 }

 #CustomerUL li a {
     border: 1px solid #ddd;
     margin-top: -1px;
     background-color: #f6f6f6;
     padding: 12px;
     text-decoration: none;
     font-size: 18px;
     color: black;
     display: block
 }

 #CustomerUL li a:hover:not(.header) {
     background-color: #eee;
 }

 .RegisterTitle {
     text-align: center;
     padding: 20px 0px;
 }
Next, copy and paste the following into your portal's Custom Javascript box:
function CustomerFunction() {
    var input, filter, ul, li, a, i, txtValue;
    input = document.getElementById("CustomerInput");
    filter = input.value.toUpperCase();
    ul = document.getElementById("CustomerUL");
    li = ul.getElementsByTagName("li");
    for (i = li.length - 1; i >= 0; i--) {
        a = li[i].getElementsByTagName("a")[0];
        txtValue = a.textContent || a.innerText;
        if (txtValue.toUpperCase().indexOf(filter) > -1) {
            li[i].style.display = "";
        } else {
            li[i].style.display = "none";
        }
    }
}


function dmLoad() {
    $("#liRegister a").attr("href", "https://CUSTOM-PAGE-LINK-HERE");
    $("#hlkRegister").attr("href", "https://CUSTOM-PAGE-LINK-HERE");
}
The very last step is to copy the link to the custom register page you created on the portal and paste it into the code above in the two places near the end of the code where it says https://CUSTOM-PAGE-LINK-HERE
That's all folks! Give your new registration process a try!
Please note; there can only be one "function dmLoad" per portal so if one already exists on your theme, copy the code inside this function, then paste it before the closing bracket of your existing function.
If you have any ideas you'd like to see us tackle email our support team at support@docketmanager.ca


