Utilizing Google Analytics – Continued
January 26, 2022

Customer Support Process
January 11, 2022
Feature Request Content: Enhancements
February 23, 2022Tracking conversions
How to track actions on your portals.
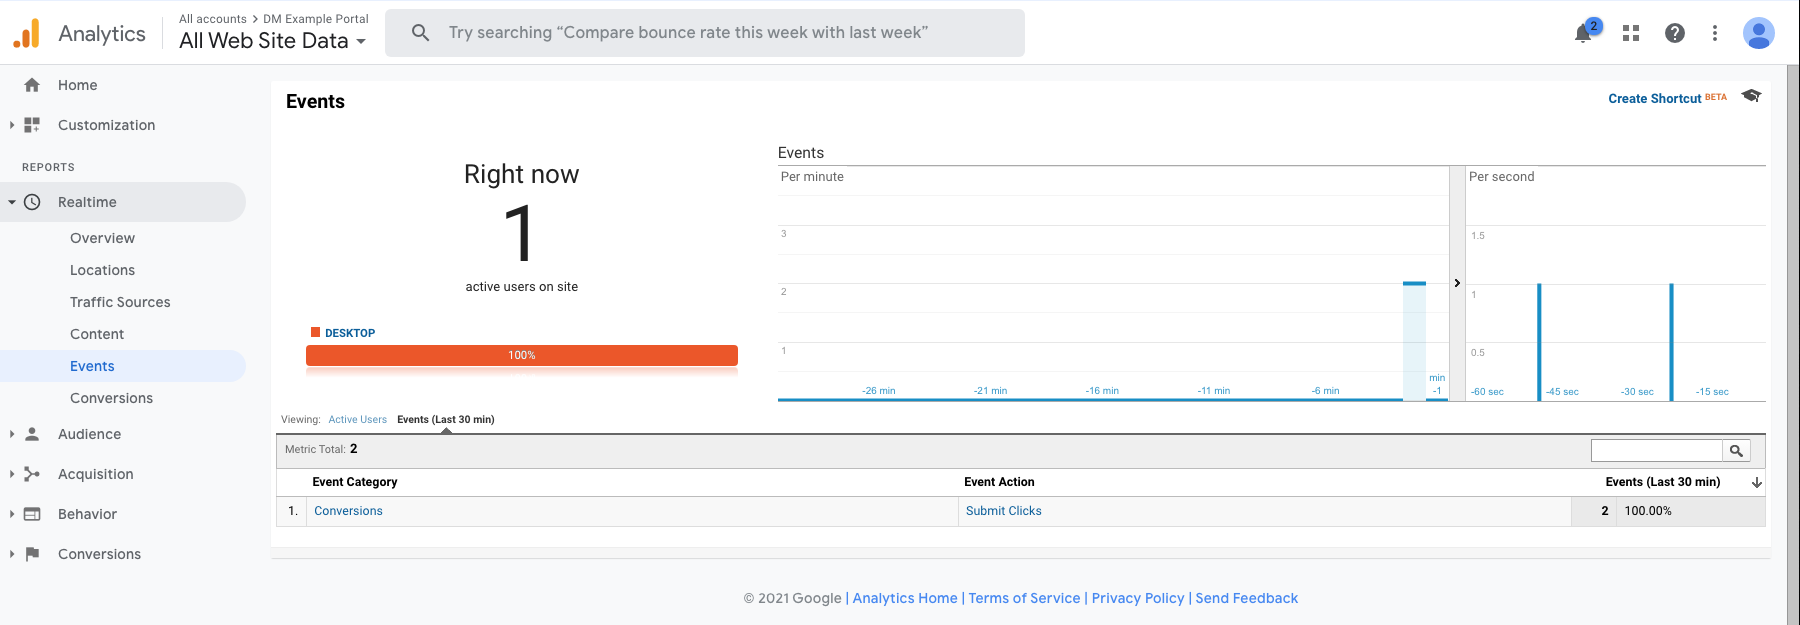
Since our first post on Google Analytics, we have had some customers ask how to track certain actions that take place on portals. While Google Analytics will show you the pages a user visits, how long they stayed on the page, and other data on the user, it won't show you where a user clicks to get there or any other action that took place on the page.
This blog post wil show you how to set up advanced tracking on your portals with the use of Google Tag Manager.
If you haven't already, we recommend completing the setup of Google Analytics on your portal prior to taking the steps in this post. The initial blog post can be found here:
Utilizing Google Analytics
Step 1. Set up Google Tag Manager on your portal
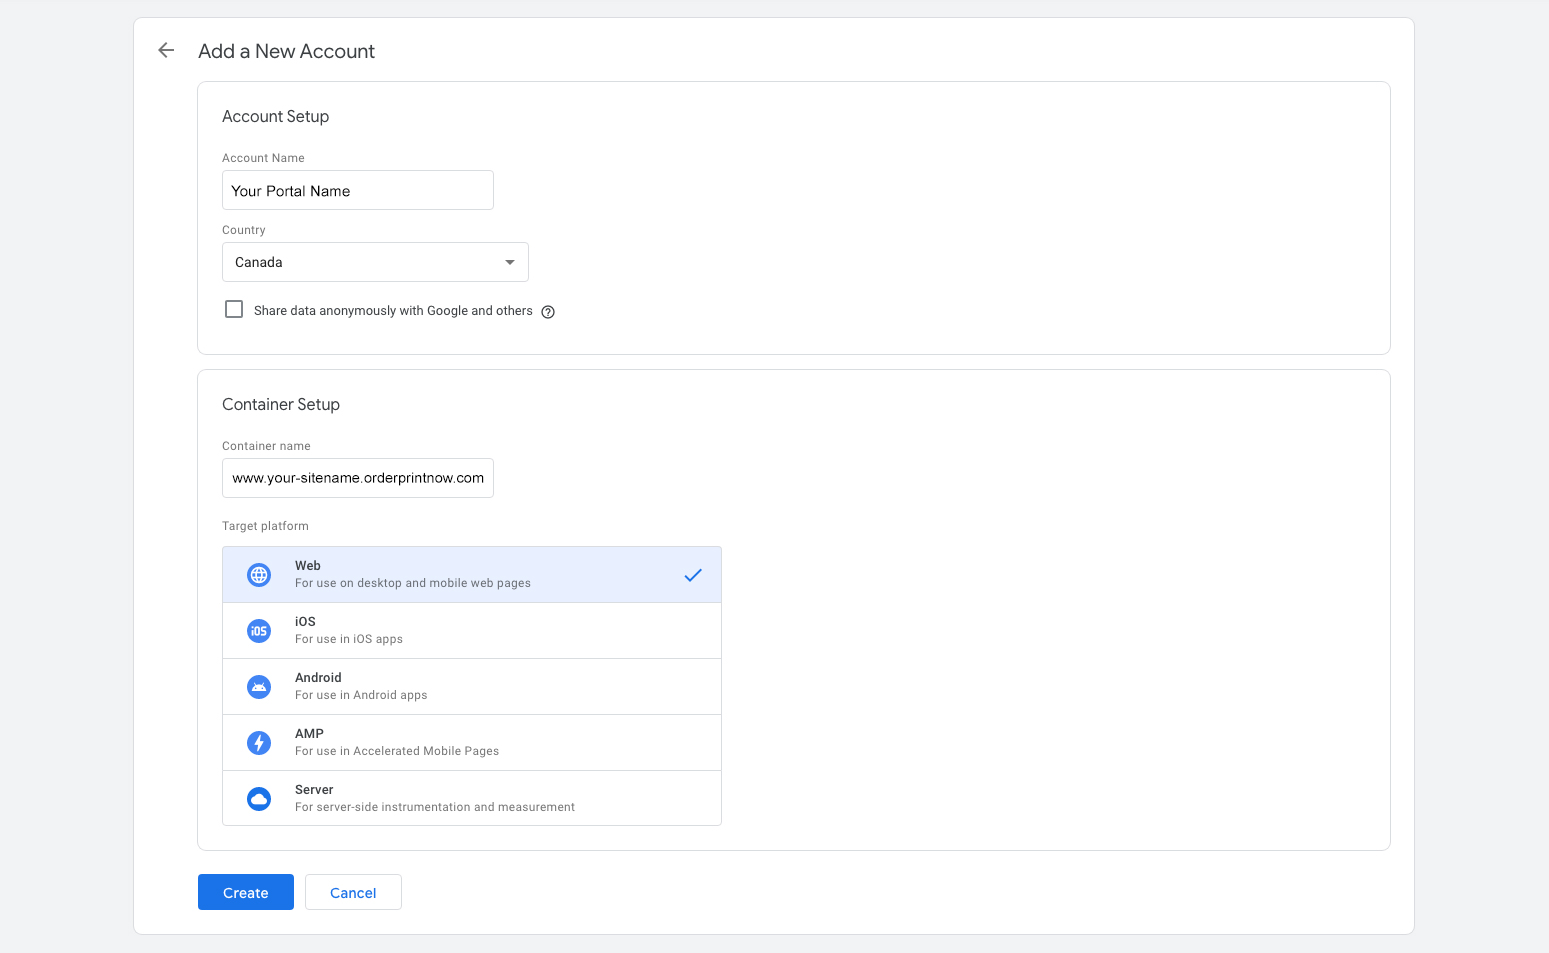
2. Sign up for a free account:
• Enter account name & country
• Enter your-site-name.orderprintnow.com for container name
• Choose Web
• Accept terms & conditions
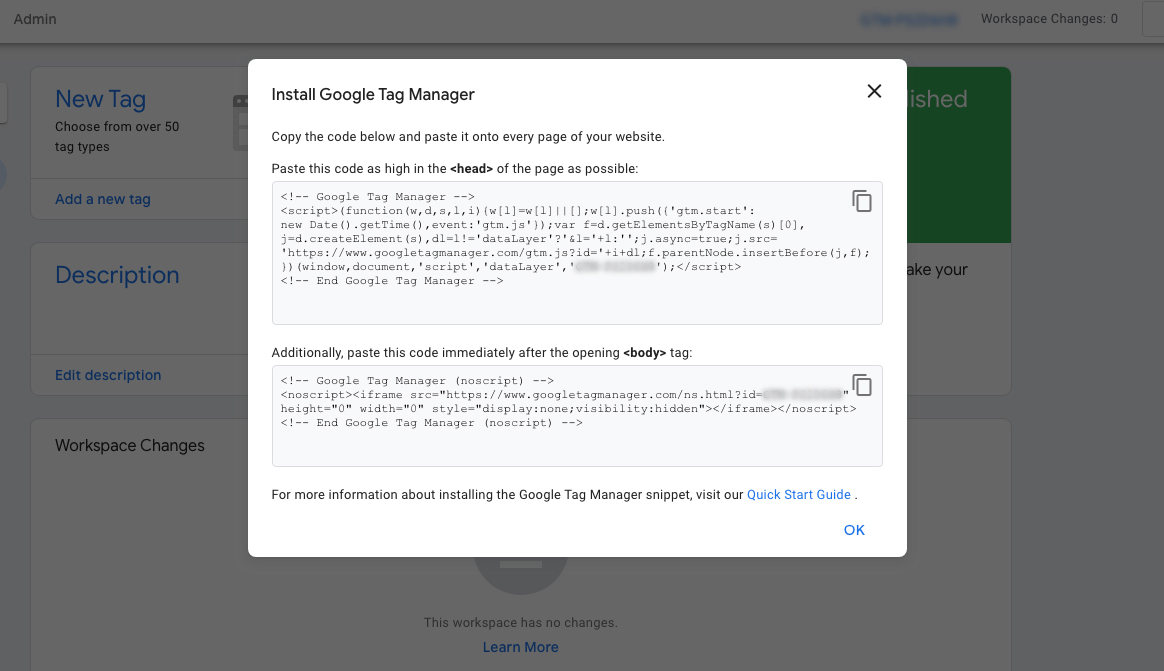
3. Install Tag Manager:
• Copy the code for the head of the page and paste without the script tags into the Portal's Custom Javascript.
Ours looked like this:
Ours looked like this:
(function(w, d, s, l, i) {
    w[l] = w[l] || [];
    w[l].push({
        'gtm.start': new Date().getTime(),
        event: 'gtm.js'
    });
    var f = d.getElementsByTagName(s)[0],
        j = d.createElement(s),
        dl = l != 'dataLayer' ? '&l=' + l : '';
    j.async = true;
    j.src =
        'https://www.googletagmanager.com/gtm.js?id=' + i + dl;
    f.parentNode.insertBefore(j, f);
})(window, document, 'script', 'dataLayer', YOUR-ACCOUNT-ID-HERE');
• We then need to add the script to the body tag.
We chose to add it to the bottom of the footer file (Theme > Footer HMTL) to reduce page bloat upon load.
Under our closing footer tag, we pasted the code so it looked like this:
Under our closing footer tag, we pasted the code so it looked like this:
</footer>

<noscript>
<iframe src="https://www.googletagmanager.com/ns.html?id=GTM-PS2D6H8" height="0" width="0" style="display:none;visibility:hidden"></iframe></noscript>
Step 2. Find the action you want to track
Determine which actions you would like to collect data on.
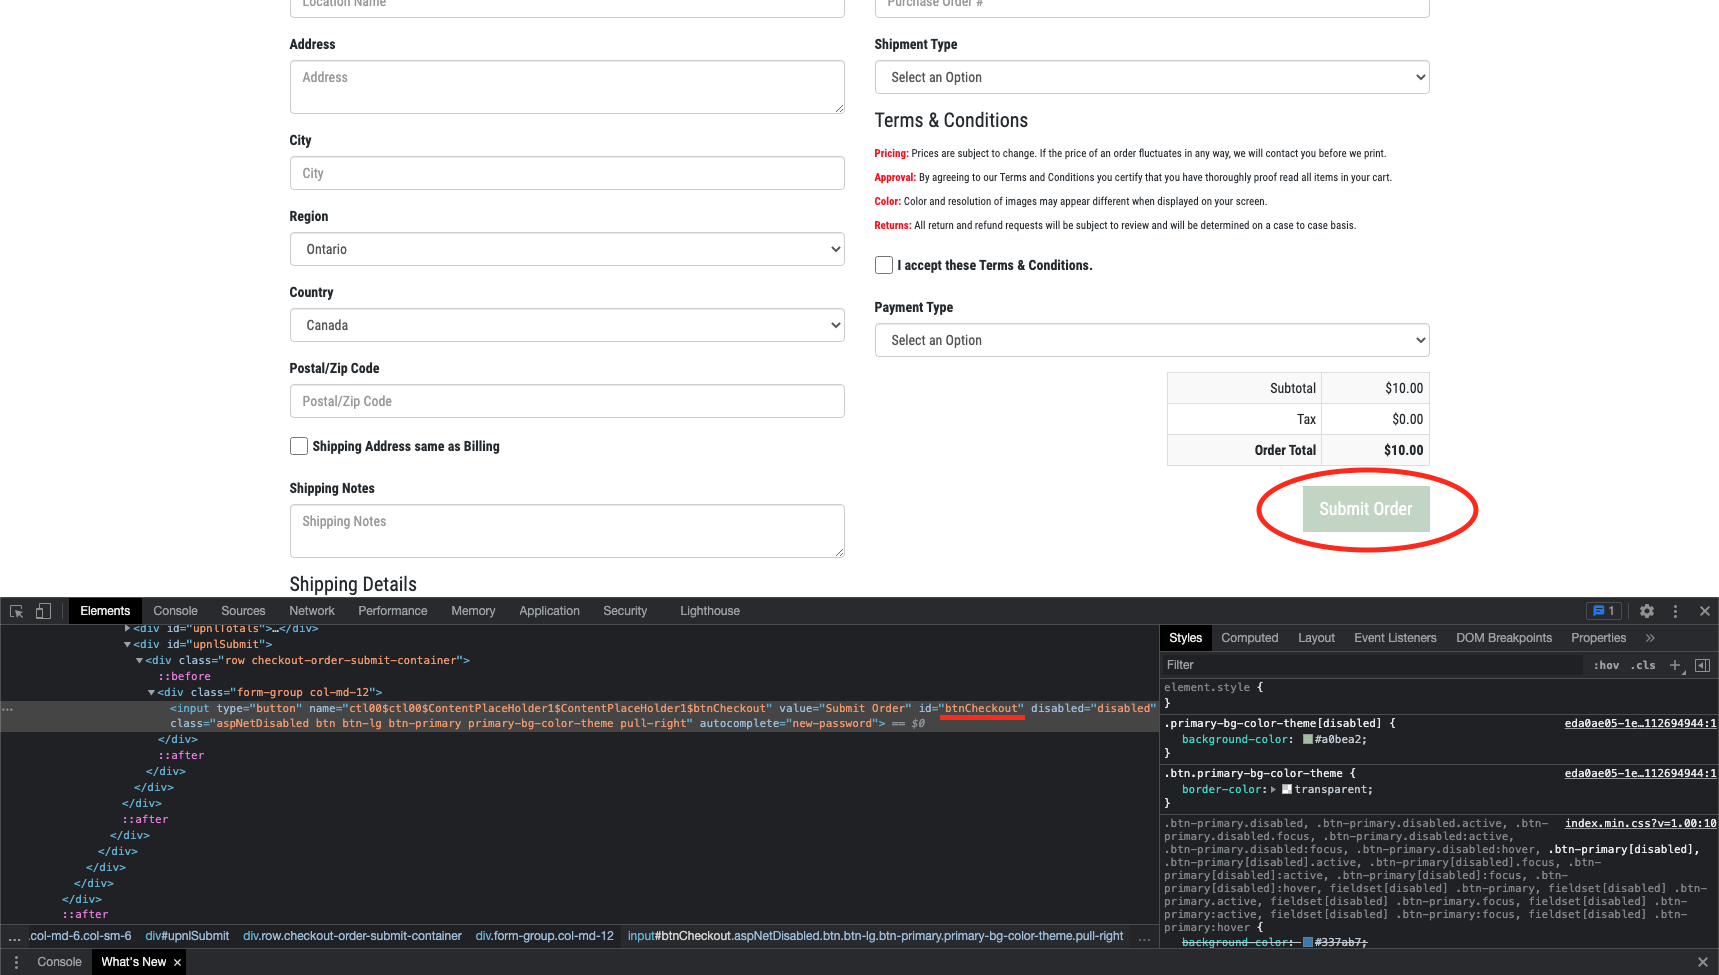
For this example we will set up tracking for the "Submit" button on the checkout page. This will allow us to track conversions better and also see what pages a user visited before making their purchase.
Copy the ID of the element you would like to track. To do this, right click on it > Inspect > in the Element inspector you will see the ID in the highlighted text. For this example, our ID is btnCheckout.
Copy this ID and paste it somewhere so that we can access it easily later.
Configuring the event in Tag Manager:
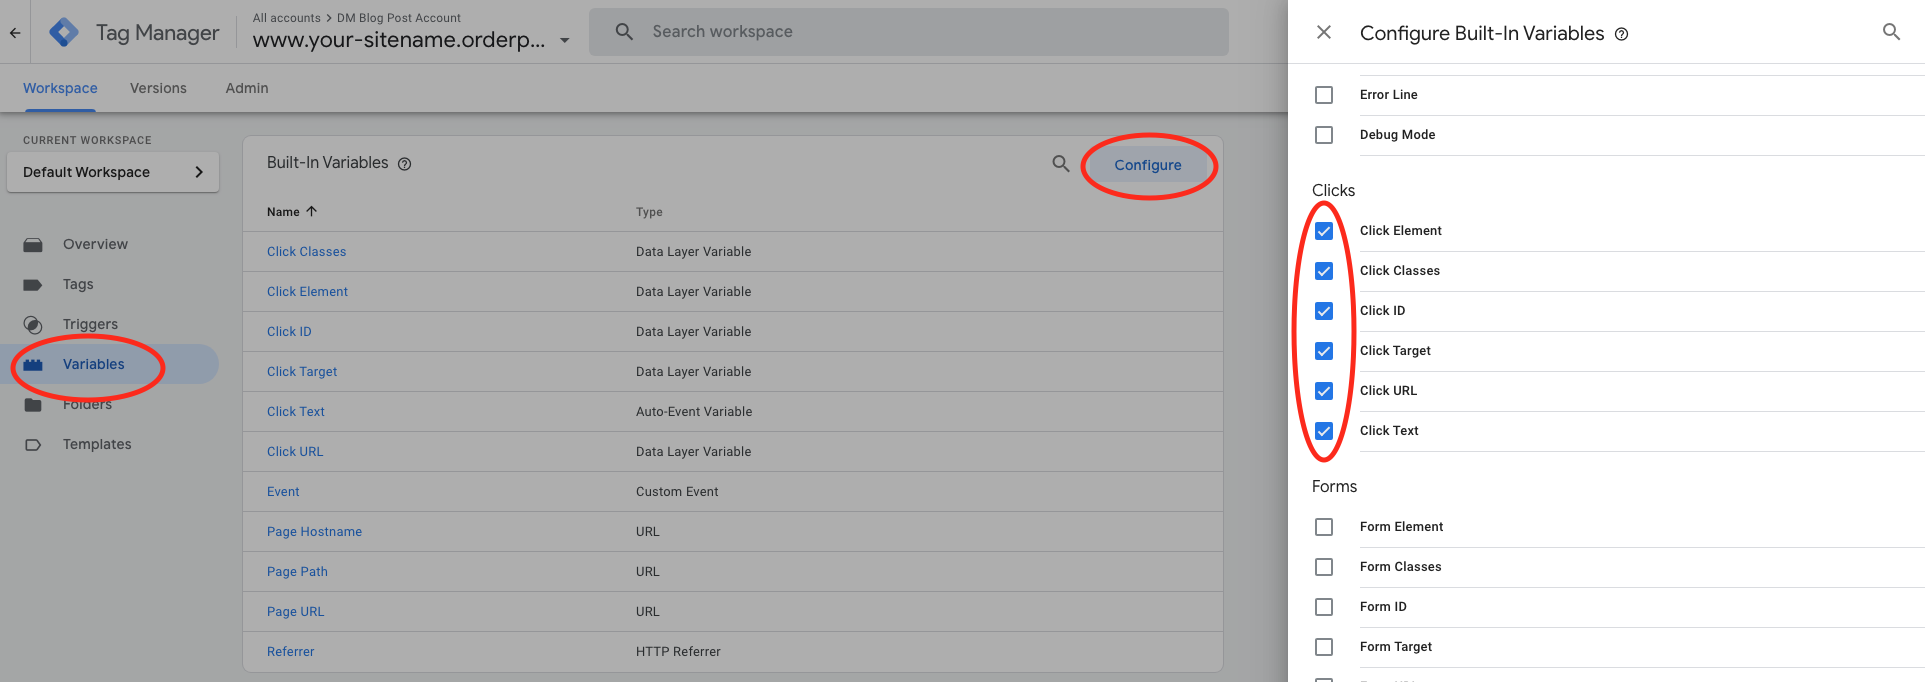
1. On the home page of your Tag Manager Workspace, click Variables > Configure > and select all Click options
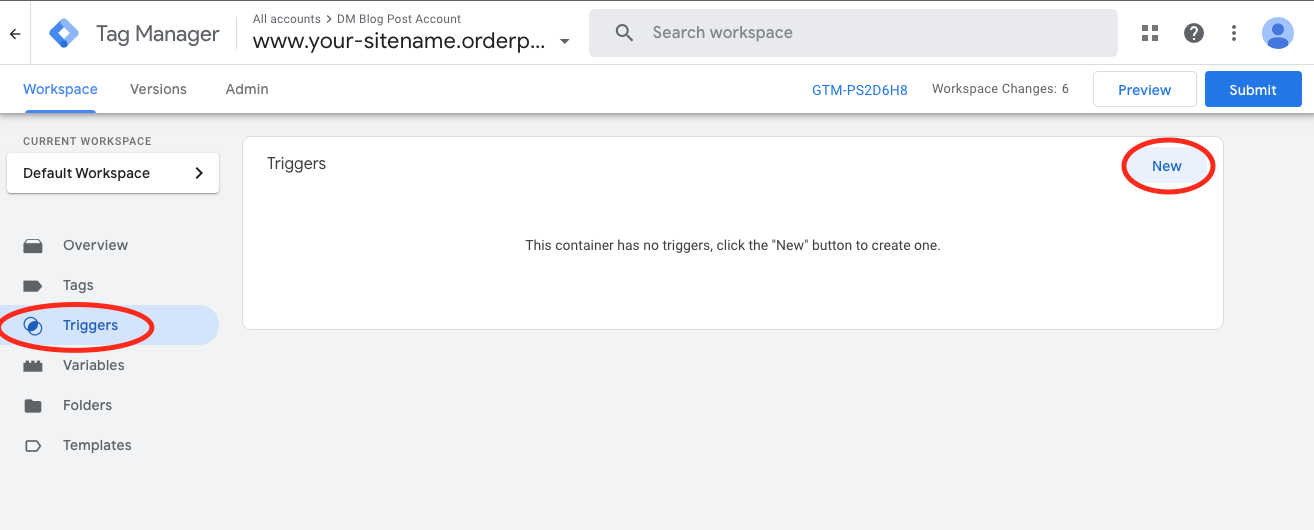
2. Next, click Triggers > New > then All Elements under Click.
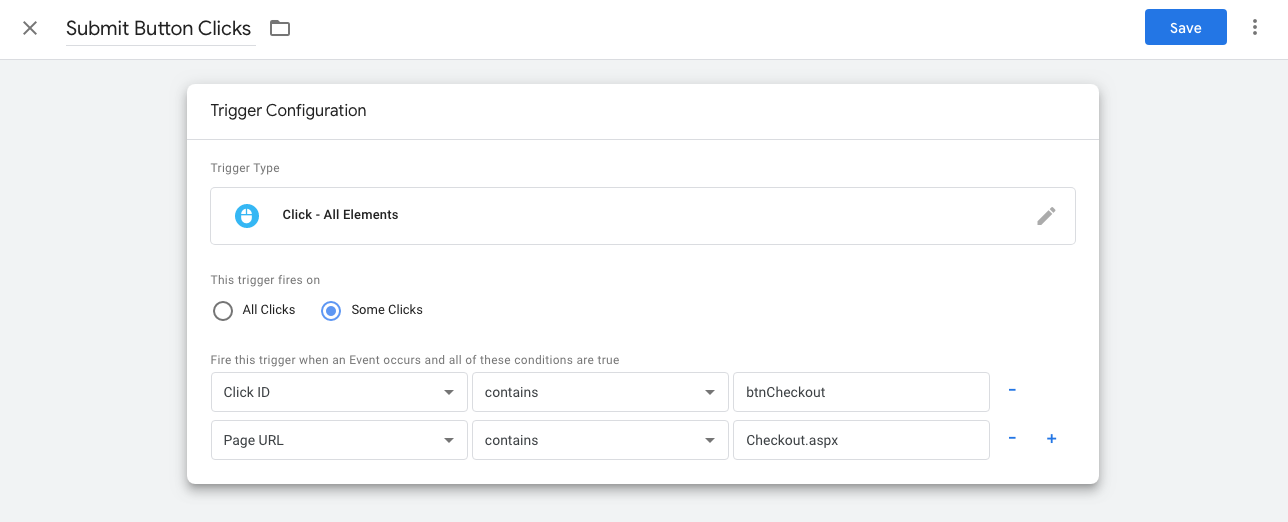
3. Give the trigger a name at the top left and select Some Clicks.
4. Add two conditions that need to be met:
Click ID contains btnCheckout
and
Page URL contains Checkout.aspx
Then click Save.
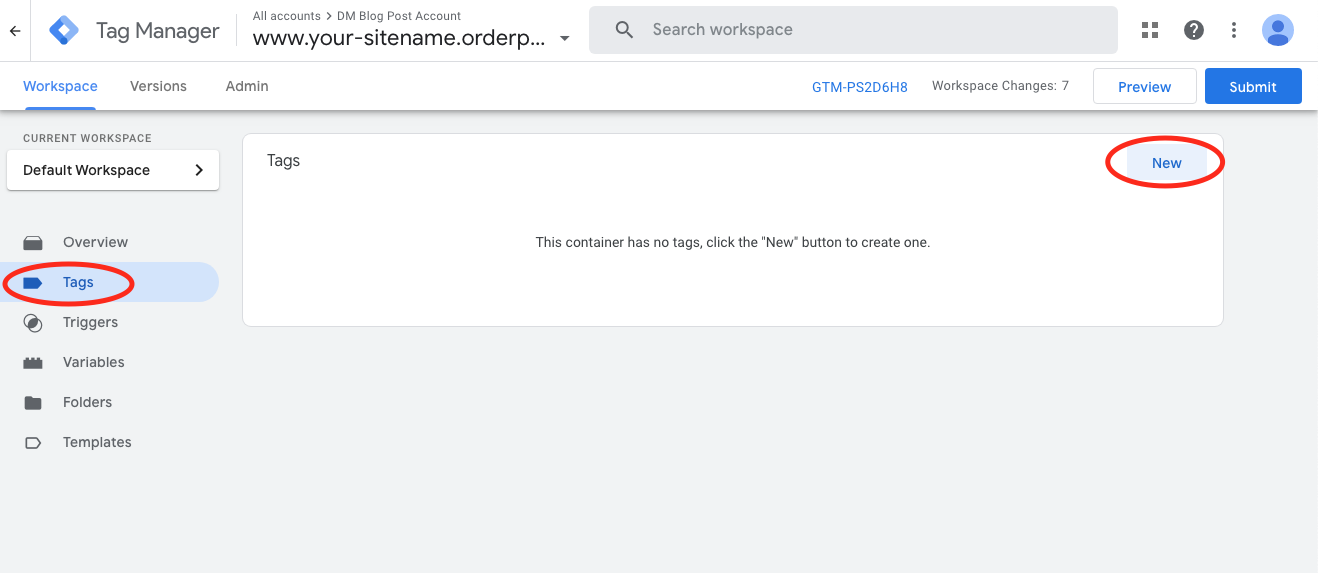
5. Lastly, click Tags > New.
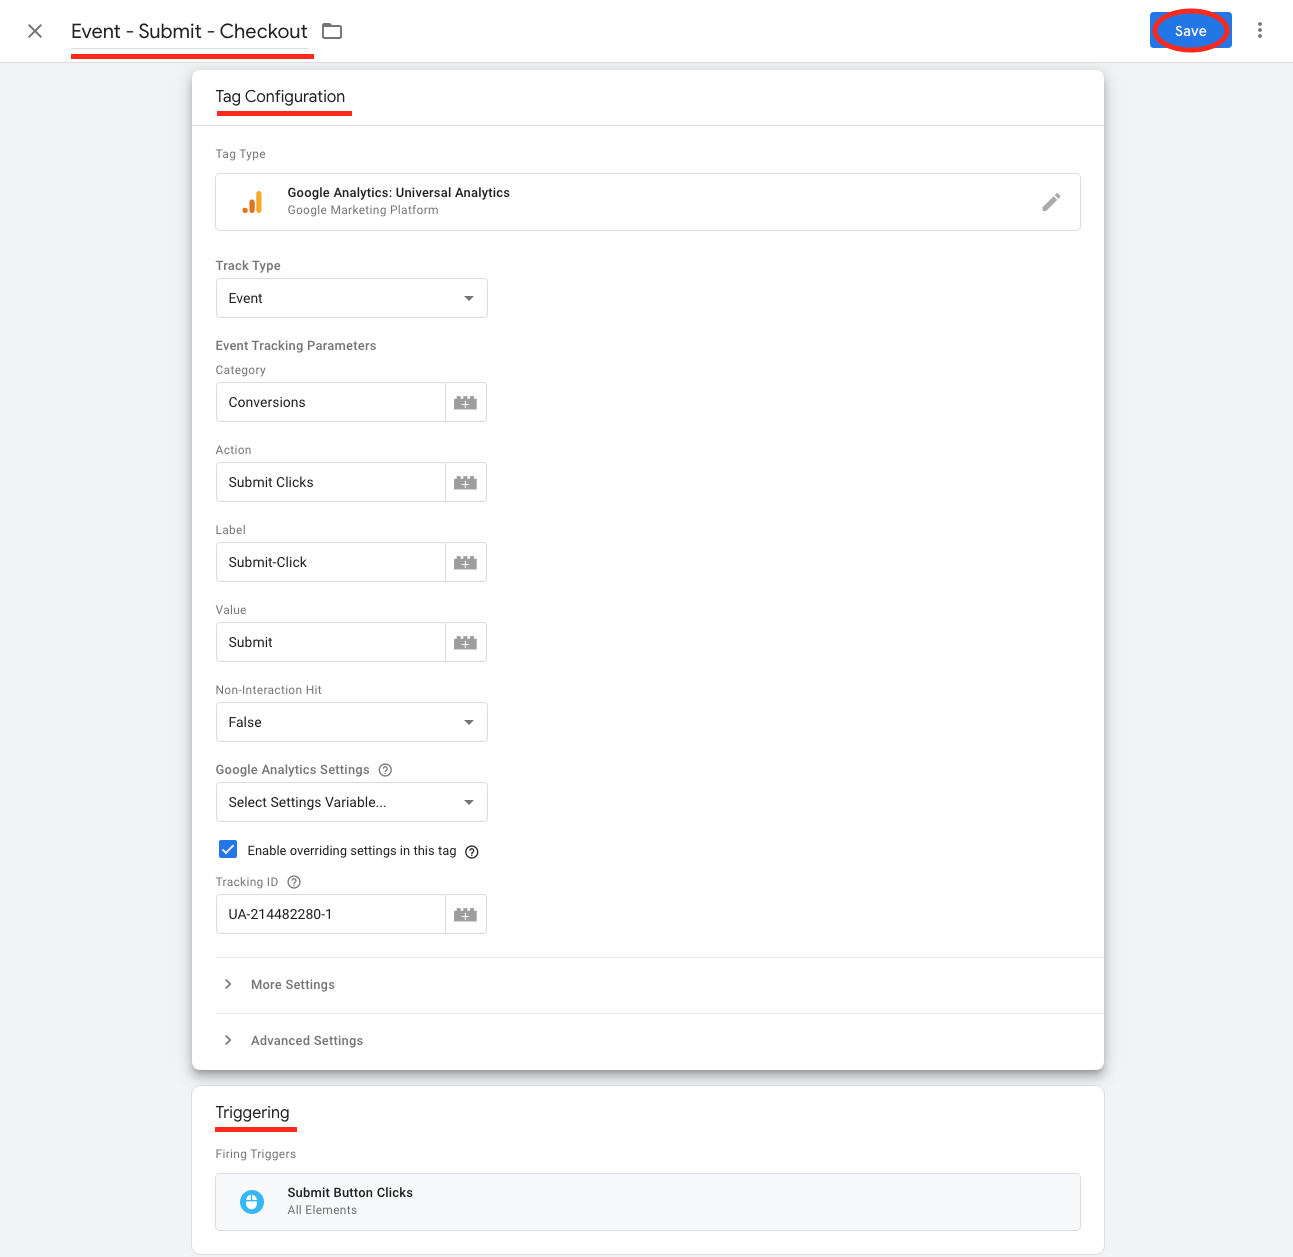
6. Give the tag a name in the top left, then click in the Tag Configuration section and select Google Analytics Universal Analytics.
7. Label your category, action and label event tracking parameters with how you want them to appear in your Google Analytics Report.
8. Click the Enable overriding settings in this tag box to enable the Tracking ID box.
9. In your Google Analytics account, find your Universal Analytics account in Admin and copy the Tracking ID (this must start with "UA-"), paste this into the Tracking ID box.
10. Scroll down and add your “trigger” created in the last step.
11. Click Save.
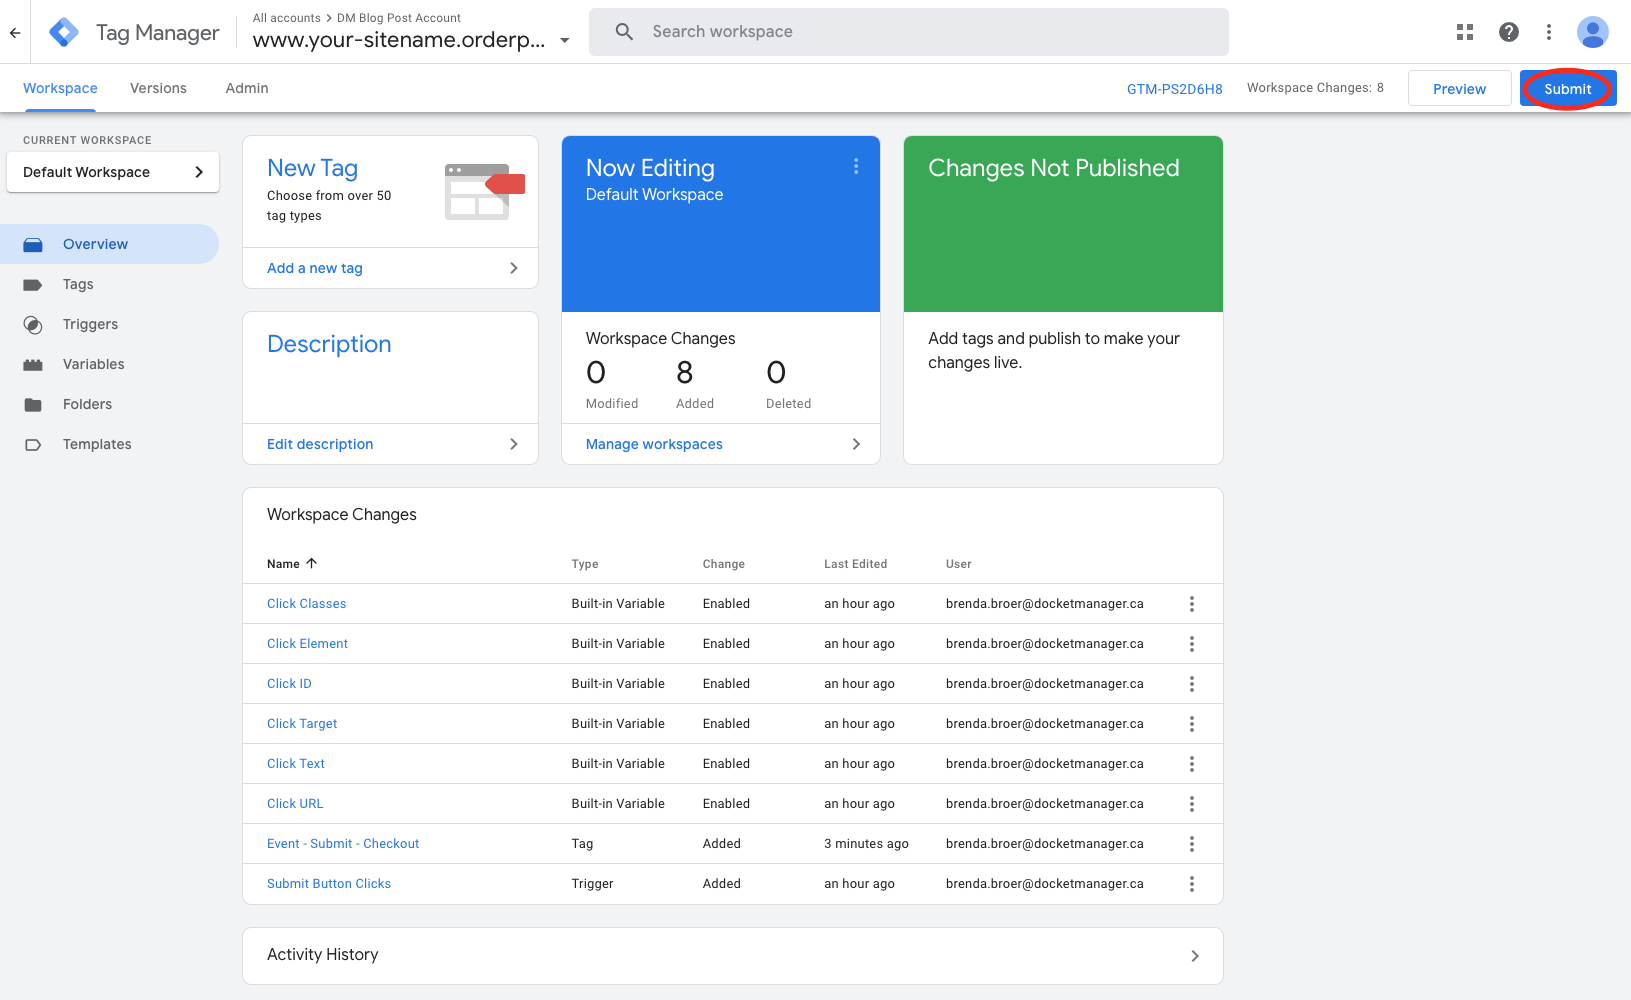
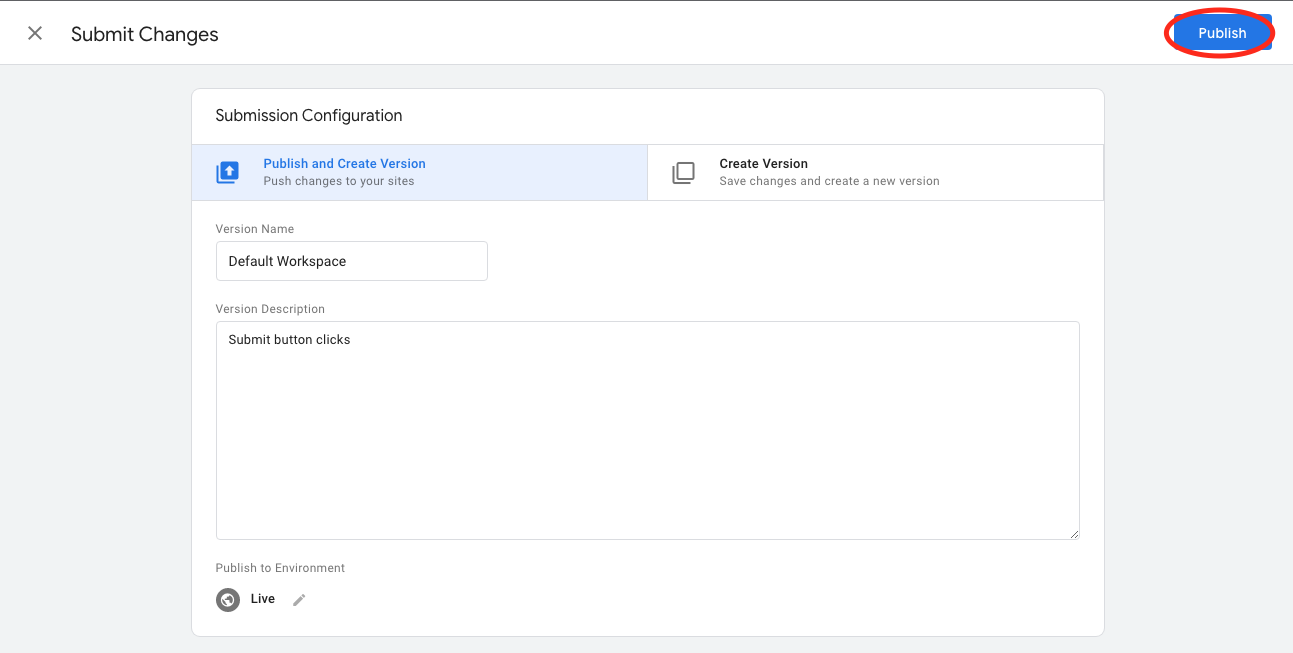
12. Click Submit in the top right corner.
13. A sidebar will pull out where you can Publish your changes.
If you need help implementing this tracking code, email our support team at support@docketmanager.ca

